Tools in Photoshop: How to Use
Adobe Photoshop CC
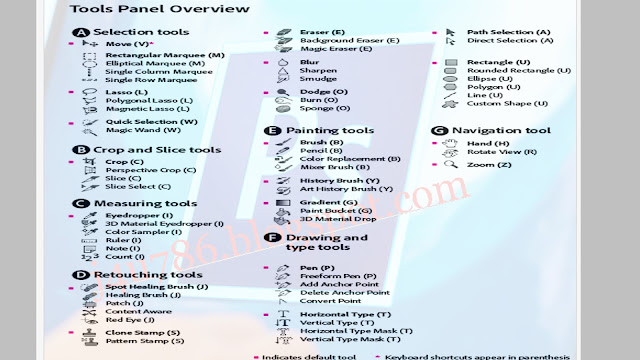
What are the tools in Photoshop? There are dozens of options at your disposal in Adobe Photoshop CC, but here are some of the most commonly used that you’ll see on just about every project you take on. You can find these and many more tools by clicking Window → Tools, or by pressing the T key on your keyboard. Here’s how to use them.
 |
| Tools in Photoshop: How to Use Adobe Photoshop CC |
Which Tool Should I Start With?
When you first start out, you may be overwhelmed by all of the tools and options available to you. The best way to learn is through practice. That being said, here are some tips for getting started with your favorite toolset. If you’re new to editing images or just want a refresher on what each tool does, check out our quick video overviews below. We also have video tutorials that go into more detail about how each feature works.
The Pen Tool
One of Adobe Photoshop’s most-used tools is probably also one of its least intuitive. The Pen Tool is an essential tool that allows you to draw shapes and paths and edit selections on your canvas. While it takes some time to get used to, once you do, your designs will start taking shape. Once you know how it works and when you should use it, use these techniques to create select freehand drawings and shapes with ease. Note that different versions of PS have a slightly different pen interface, but we’ll go over some tips that work in any version.
Gradient Fill Tool
Although you can use a gradient to fill shapes and paths, it can be tricky. Fortunately, Photoshop has an easy-to-use tool for filling objects with gradients—the Gradient Fill Tool (G). In order to use it, select your object or group of objects that you want to fill, then head up top and click on Foreground Color or press d. This will bring up a color palette where you can choose your color. After selecting your color, go back down to your tools and select Gradient Fill from the list (it’s at the bottom). This will open up a new window where you can choose which colors are going to make up your gradient. You can also adjust other settings like transparency here as well. When you’re done choosing colors, click OK and Photoshop will automatically fill in any shape or path with that particular gradient!
Clone Stamp Tool
 |
| Tools in Photoshop: How to Use Adobe Photoshop CC |
The Clone Stamp tool is ideal for replacing small sections of an image with a copy of another portion. To do so, select your Clone Stamp tool and sample a section of an image by holding down Alt/Option while clicking on that area. This sets that area as your source point, and you can then click elsewhere on your picture to cover up unwanted areas with similar sections from your source.
Brush Tool
The Brush Tool, as its name implies, allows you to draw a variety of different types of brushes onto your photo. The size and shape of each brush can be manipulated with brush editing features such as flow and opacity. You can even apply textures or patterns to your brush if desired. This tool is an excellent way to add details like hair or fur to a photo without having to actually draw it yourself. It’s also great for adding fine details like dust particles or water droplets on glass.
Dodge and Burn Tool
The Dodge and Burn tools are used together (hence their names) to selectively lighten or darken certain areas of an image. They work by increasing or decreasing contrast and saturation in specific regions of an image and therefore should not be confused with filters that change a whole photo at once. Though you can use them for color correction, it’s best if you reserve these tools for dodging and burning parts of your photo rather than using them as primary editing tools.


No comments:
Post a Comment